Unlocking the world of scrapbooking with stamps offers endless possibilities for creativity and self-expression. Whether you’re a beginner looking to get started or a seasoned crafter seeking new inspiration, this comprehensive guide provides the tools and techniques needed to take your scrapbooking skills to the next level.
From understanding how to use stamps effectively in your scrapbooking projects to exploring innovative ways to incorporate vintage stamps and die-cuts, this article covers it all. With expert advice and practical tips, you’ll learn how to choose the right ink colors, optimize stamp placement, and create stunning scrapbook pages that showcase your unique style.
Whether you’re interested in learning about the basics of scrapbooking with stamps or diving deeper into advanced techniques, this article is designed to meet your needs. With its engaging tone and accessible language, you’ll feel confident and inspired to start creating your own beautiful scrapbook pages.
So why wait? Dive into the world of scrapbooking with stamps today and discover a whole new world of creative possibilities.
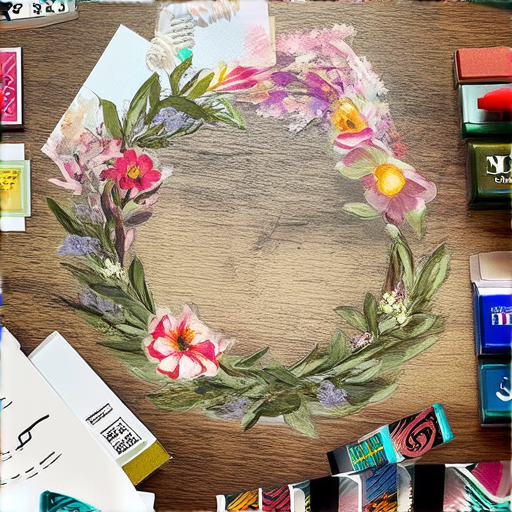
**Using Stamps for Scrapbooking**
Scrapbooking can be a fun and creative hobby, and incorporating stamps into your projects can add an extra layer of detail and interest. Here are some steps to help you get started:
1. Choosing Your Stamps
Before you begin, select the stamps you want to use for your project. Consider the theme, color palette, and overall aesthetic you’re aiming for. You can choose from various types of stamps, including clear stamps, photopolymer stamps, and rubber stamps.
Sweet Pea Stamps offers a wide range of stamps that cater to different tastes and preferences. Their collection includes beautiful floral patterns, cute animals, and inspirational quotes, making it easy to find the perfect stamps for your project.
2. Preparing Your Stamps
To ensure your stamps work well with your scrapbooking supplies, prepare them before use. Gently wipe away excess ink from the stamp using a soft cloth, baby wipes, or a damp paper towel. This helps prevent ink smudging and ensures crisp images.
Baby wipes are a popular choice for cleaning stamps because they are gentle and effective. Wet paper towels or rags can also be used, but be cautious not to soak the stamp too much, which may cause it to become misshapen.
3. Applying Ink
Once your stamp is clean, apply ink to the desired area. You can use a variety of ink pads, including water-based, acrylic, or pigment-based inks. Make sure to follow the manufacturer’s instructions for optimal results.
Experiment with different ink colors and combinations to create unique effects. Consider using metallic or glitter inks to add an extra touch of sparkle to your designs.
4. Stamping Techniques
To achieve the desired look, experiment with various stamping techniques, such as:
Direct stamping: Place the stamp directly onto your scrapbook page.
Layering: Stamp multiple times to build up layers of image.
Stamping with texture: Use textured stamps or add texture with other materials to enhance your design.
5. Tips and Tricks
Always test your stamps on a scrap piece of paper before applying them to your actual project. Clean your stamps regularly to maintain their effectiveness. Store your stamps in a dry, protected area to prevent damage.
By following these steps and experimenting with different techniques, you can unlock the full potential of stamps in your scrapbooking projects. Remember to have fun and be creative – the world of stamping offers endless possibilities!
Scrapbooking Supplies for Beginners
When starting your scrapbooking journey, it’s essential to have the right tools and materials. Here are some basic supplies you’ll need to get started:
- Basic Tools Needed for Scrapbooking with Stamps
- Dye-based or pigment-based ink pads for your stamps
- Scrapbooking paper in various colors and patterns
- A cutting mat and scissors for cutting paper
- A ruler or straightedge for measuring and aligning elements
- A pencil or pen for marking and writing
Essential Materials for Creating Scrapbook Pages
In addition to the basic tools, you’ll also need some essential materials to create beautiful scrapbook pages. Consider the following:
- Photos and memorabilia
- Adhesive, such as glue stick or tape runner
- Embellishments, like stickers, die-cuts, or ribbons
- Journaling cards or pens for writing captions
- A photo corner or adhesive dots for securing photos
Choosing the Right Ink for Your Stamps
When it comes to selecting the perfect ink for your stamps, there are several factors to consider.
- Type of Paper: Different types of paper require different types of ink. Thicker papers, such as cardstock or construction paper, can handle dye-based inks, which are known for their vibrant colors and fast-drying properties. However, if you’re working with thin papers, such as printer paper or vellum, pigment-based inks may be a better choice.
- Stamp Type: If you have self-inking stamp pads, they typically use dye-based inks. These inks are convenient because they don’t require re-inking, but they can bleed slightly into the paper. On the other hand, rubber stamps often require separate ink pads, which can be either dye-based or pigment-based.
- Desired Color Intensity: Pigment-based inks tend to produce deeper, richer colors than dye-based inks. However, they can take longer to dry and may not be suitable for applications where speed is critical.
- Environmental Concerns: Some people prefer eco-friendly options, such as soy-based or plant-based inks. These inks are biodegradable and non-toxic, making them a great choice for artists and crafters who work with natural materials.
- Cost: Dye-based inks are generally less expensive than pigment-based inks, especially for small quantities. However, pigment-based inks can last longer and provide more consistent color.
Some popular ink options for stamps include:
- Dye-Based Inks: Fast-drying, water-like consistency, ideal for regular paper surfaces, and commonly used in self-inking stamp pads.
- Pigment-Based Inks: Deeper, richer colors, slower drying time, and often used in high-quality art supplies.
- Soy-Based Inks: Biodegradable, non-toxic, and eco-friendly options made from soy protein and other natural ingredients.
- Gel-Based Inks: Thick, gel-like consistency, often used in high-end art supplies, and can produce unique textures and effects.
Ultimately, the best ink for your stamps will depend on your specific needs and preferences. By considering factors such as paper type, stamp type, desired color intensity, environmental concerns, and cost, you can choose the perfect ink to enhance your stamping experience.
Recommended Brands for Scrapbooking Stamps and Supplies
There are many excellent brands available for scrapbooking stamps and supplies. Here are a few recommendations:
- Sweet Pea Stamps: Known for their high-quality stamps and supplies, Sweet Pea Stamps offers a wide range of products for scrapbookers and crafters.
- Other notable brands include:
- Tim Holtz
- Die-Namic
- Impression
Best Places to Buy Scrapbooking Supplies Online
There are many online retailers that offer a wide selection of scrapbooking supplies. Here are a few recommendations:
- Amazon: Amazon offers a vast selection of scrapbooking supplies, including stamps, paper, and embellishments.
- Other notable online retailers include:
- Michaels
- Hobby Lobby
- Joann Fabric and Craft Stores
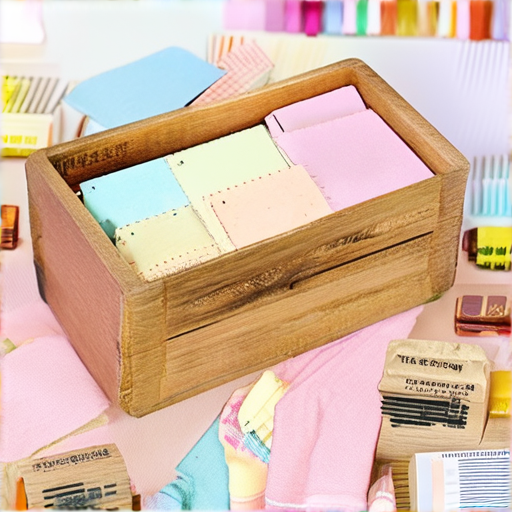
**Cleaning Clear Stamps for Scrapbooking**
To effectively clean clear stamps for scrapbooking, follow these steps:
1. **Gather necessary materials**: Start by collecting the following items:
– A soft-bristled toothbrush or small paintbrush
– Mild soap or dish soap
– Warm water
– A clean cloth or paper towel
– Optional: a small container filled with warm water and a few drops of white vinegar
2. **Remove excess ink**: Gently scrub the stamp with the soft-bristled toothbrush or small paintbrush to remove any excess ink. Be careful not to scratch the surface of the stamp.
3. **Mix cleaning solution**: In a small bowl, mix 1 tablespoon of mild soap with 1 cup of warm water. Stir well to create a gentle cleaning solution.
4. **Soak the stamp**: Submerge the stamp into the cleaning solution and let it soak for about 10-15 minutes. This will help loosen any stubborn ink residue.
5. **Rinse the stamp**: Using a clean cloth or paper towel, gently wipe away any remaining ink and soap residue from the stamp. If needed, repeat this process until the stamp is free of ink.
6. **Dry the stamp**: Allow the stamp to air dry completely before using it again. You can speed up the drying process by placing the stamp between two sheets of paper towels or a clean cloth.
7. **Optional: Vinegar rinse**: To further sanitize and prevent future ink buildup, mix equal parts water and white vinegar in a small container. Soak the stamp in the solution for about 5-10 minutes, then rinse thoroughly with clean water.
For more tips on cleaning and maintaining your clear stamps, visit our website at Sweet Pea Stamps. We offer a variety of resources and tutorials to help you get started with scrapbooking and stamping.
**Storage and Organization for Stamps and Scrapbooking Supplies**
Proper storage and organization of your stamps and scrapbooking supplies is essential for maintaining their quality and extending their lifespan. Here are some ideas for organizing your stamps by type and color:
* Sort your stamps into categories, such as floral, geometric, or abstract designs.
* Use dividers or small containers to separate your stamps by color or theme.
* Consider investing in a stamp storage box or case to protect your stamps from damage and dust.
* Keep your most frequently used stamps in easy-to-reach locations, such as near your workspace or in a convenient storage bin.
For inspiration and guidance on storing and organizing your scrapbooking supplies, check out our blog at Sweet Pea Stamps Blog. We feature regular posts on topics such as stamp storage, scrapbooking organization, and more.
Scrapbooking Without Photos: Innovative Techniques to Tell Your Story
When it comes to scrapbooking, many people assume that photos are essential to capturing memories and telling stories. However, there are numerous creative ways to scrapbook without photos, allowing you to express yourself through words, textures, and emotions.
1. Use Hand-Drawn Illustrations
Sweet Pea Stamps offers a variety of hand-drawn illustration templates that can be customized to fit your style. With markers, colored pencils, or watercolors, you can bring your story to life and create unique artwork.
2. Typography as Art
Experiment with different fonts, sizes, and colors to create a visually appealing layout. You can use pre-designed word art or create your own using software like Adobe Illustrator or Canva. This technique allows you to convey emotions and moods through text alone.
3. Collage with Paper Textures
Combine paper textures like lace, burlap, or music sheets to create a unique collage. Add handwritten notes, quotes, or lyrics to give your scrapbook a personal touch. For inspiration, check out the latest scrapbooking trends on Google.
4. Embellish with Stickers and Washi Tape
Use stickers and washi tape to add visual interest to your pages. These small details can help tell a story or highlight important events. Visit Sweet Pea Stamps for a wide selection of stickers and washi tape.
5. Incorporate Memorabilia
Include ticket stubs, postcards, or other memorabilia to add a tangible element to your scrapbook. Write captions or journal entries to explain the significance of each item. Check out scrapbooking memorabilia on Google for inspiration.
6. Create a Word Cloud
Design a word cloud using keywords related to your story. This visual representation can help illustrate themes, emotions, or ideas. Use a tool like WordClouds to create your own word clouds.
7. Use Journaling Prompts
Utilize journaling prompts to guide your writing and reflection. Ask yourself questions about the event, person, or experience you’re documenting, and write down your thoughts and feelings. Find journaling prompts on Google or visit Sweet Pea Stamps for inspiration.
8. Add Embellishments with Fabric
Incorporate fabric scraps, ribbons, or lace to add texture and depth to your pages. These materials can evoke emotions and create a sensory experience. Check out Google for fabric embellishment ideas.
9. Make a Timeline
Create a timeline of significant events or milestones in your life. Use dates, symbols, or icons to represent different periods or experiences. Use a tool like Google to find timeline templates.
10. Experiment with Different Formats
Try non-traditional formats like mini-albums, accordion-style books, or even digital scrapbooks. This flexibility allows you to experiment with different storytelling styles and techniques. Visit Google for inspiration on alternative scrapbooking formats.
Incorporating Vintage Stamps into Your Scrapbooking Projects
When it comes to adding a unique touch to your scrapbooking projects, vintage stamps are a great place to start. Not only do they offer a wide range of designs and themes, but they can also add a personal and sentimental element to your pages.
Embellish Backgrounds
One of the easiest ways to incorporate vintage stamps into your scrapbooking projects is to use them to create unique backgrounds for your pages. Simply apply the stamps to watercolor paper or textured cardstock to give them a distressed look, and then use this background as a base for your photos or journaling.
Learn More About Watercolor Paper
Add Dimensional Interest
Another great way to use vintage stamps in your scrapbooking projects is to combine them with dimensional embellishments like die-cuts, ribbons, or buttons. Experiment with layering different textures and materials to create a visually appealing effect.
Watch a Tutorial on Layering Textures
Create Custom Washi Tape
Vintage stamps can also be used to create custom washi tape. Simply design the tape using the stamps and a clear adhesive, cut out shapes or patterns, and apply them to your pages to add a pop of color and texture.
Check Out Some Washi Tape Inspiration
Use Stamps as Journaling Accents
Vintage stamps can also be used to accentuate your journaling on scrapbook pages. Choose stamps that match the theme or tone of your writing, and apply them to the page using a marker or pen.
Make Stamped Cards and Gift Tags
Vintage stamps are also a great way to add a personal touch to your cards and gift tags. Simply choose a design that fits the occasion, add a personal message or the recipient’s name, and voila!
Experiment with Different Ink Colors
Don’t be afraid to think outside the box when it comes to using vintage stamps. Experiment with different ink colors, like red, blue, or green, to add a unique twist to your designs.
Combine Stamps with Other Embellishments
Mix vintage stamps with other embellishments like stickers, rhinestones, or sequins to create a truly unique look. Experiment with different combinations to find what works best for you.
Preserve Vintage Stamps
To ensure that your vintage stamps remain usable for years to come, store them in a protective case or envelope. Consider laminating your finished pages to preserve the stamps and prevent damage.
Get Inspired by Nature
Take inspiration from nature when designing with vintage stamps. Look to flowers, leaves, and birds for ideas, and experiment with different stamp combinations to capture their essence.
Practice Makes Perfect
As with any new skill or technique, practice makes perfect when working with vintage stamps. Don’t be discouraged if your first attempts don’t turn out as expected – keep experimenting until you find the techniques that work best for you.
**Creative Ways to Incorporate Die-Cut Stamps into Your Scrapbooking Projects and Elevate Card Making Designs**
Die-cut stamps have revolutionized the world of scrapbooking and card making, offering endless possibilities for creativity and self-expression. By incorporating these versatile tools into your projects, you can take your designs to the next level and create truly unique and personalized pieces. Here are some innovative ways to use die-cut stamps in your scrapbooking projects and card making designs:
1. Add Dimension and Texture
Die-cut stamps can add a beautiful dimension and texture to your projects. Try using them to cut out intricate shapes, flowers, or leaves, and then layer them over your background paper or photo to create a stunning effect. For example, check out [https://www.sweetpeastamps.com/](https://www.sweetpeastamps.com/) for inspiration on how to use die-cut stamps to add dimension to your scrapbooking projects.
2. Create Custom Shapes and Silhouettes
Die-cut stamps allow you to create custom shapes and silhouettes that can be used to frame your photos, highlight important details, or add visual interest to your design. You can also use them to cut out words or phrases to create a unique title or quote. Visit [https://scrapbookingwithstamps.com/](https://scrapbookingwithstamps.com/) for tips on how to use die-cut stamps to create custom shapes and silhouettes.
3. Incorporate Embellishments
Die-cut stamps can be used to cut out embellishments such as hearts, stars, or other shapes that can be used to add a pop of color and interest to your project. You can also use them to cut out intricate designs that can be used as a focal point. Check out [https://stampcrafts.net/](https://stampcrafts.net/) for inspiration on how to use die-cut stamps to incorporate embellishments into your scrapbooking projects.
4. Use Them as a Background
Die-cut stamps can be used as a background element in your project, adding a unique texture and pattern to your design. Try cutting out a large shape or design and using it as a background for your photo or journaling. Visit [https://scrapbookingmade-simple.com/](https://scrapbookingmade-simple.com/) for tips on how to use die-cut stamps as a background in your scrapbooking projects.
5. Combine with Other Techniques
Die-cut stamps can be combined with other techniques such as stamping, stenciling, or hand-stamping to create a truly unique and layered look. Experiment with different combinations to find what works best for you. Check out [https://diecutstamps.com/](https://diecutstamps.com/) for inspiration on how to combine die-cut stamps with other techniques.
6. Experiment with Different Materials
Die-cut stamps can be used with a variety of materials, including paper, fabric, and even metal. Experiment with different materials to find what works best for your project and to add an extra layer of interest. Visit [https://scrapbookingwithstampsforbeginners.com/](https://scrapbookingwithstampsforbeginners.com/) for tips on how to use die-cut stamps with different materials.
7. Use Them to Create 3D Effects
Die-cut stamps can be used to create 3D effects in your project, adding an extra layer of depth and dimension. Try cutting out shapes or designs and layering them over your background paper or photo to create a stunning effect. Check out [https://scrapbookingyoutube.com/](https://scrapbookingyoutube.com/) for inspiration on how to use die-cut stamps to create 3D effects.
8. Add a Personal Touch
Die-cut stamps can be used to add a personal touch to your project, incorporating meaningful dates, names, or quotes. Try cutting out a special shape or design and using it to commemorate a special occasion or milestone. Visit [https://scrapbookingwithstampsforkids.com/](https://scrapbookingwithstampsforkids.com/) for tips on how to use die-cut stamps to add a personal touch to your scrapbooking projects.
9. Try Layering
Die-cut stamps can be layered over each other to create a unique and complex design. Experiment with different layering techniques to find what works best for you. Check out [https://scrapbookingwithstampsandstickers.com/](https://scrapbookingwithstampsandstickers.com/) for inspiration on how to layer die-cut stamps.
10. Practice Makes Perfect
Finally, remember that practice makes perfect when it comes to using die-cut stamps in your scrapbooking projects and card making designs. Don’t be afraid to experiment and try new things – you’ll be amazed at the unique and creative possibilities that emerge.
0 Comments