When it comes to crafting unique and personalized handmade cards, one of the most effective ways to elevate your card-making skills is by incorporating simple stamping ideas. With a little creativity and experimentation, you can transform ordinary cards into extraordinary works of art that showcase your personality and style. From adding subtle texture and pattern to creating bold, eye-catching designs, simple stamping techniques offer endless possibilities for customization and self-expression.
Unleash Your Creativity: Unique Stamp Design Ideas for Handmade Cards
I’m excited to share my favorite tips and tricks for creating one-of-a-kind stamp designs that will elevate your handmade cards to the next level.
- Experiment with Different Techniques: Try layering, blending, and combining different colors and textures to create unique effects.
- Play with Shapes and Patterns: Use geometric shapes, florals, and abstract patterns to add visual interest to your designs.
- Incorporate Nature-Inspired Elements: Add leaves, flowers, and branches to give your cards a organic feel.
- Get Inspired by Art and Culture: Draw inspiration from famous artists, historical periods, and cultural traditions to create distinctive designs.
Discover New Sources of Inspiration
As a crafter, I’m always on the lookout for fresh ideas and inspiration. Here are some of my go-to resources:
- Pinterest: A treasure trove of creative ideas and inspiration boards.
- Instagram: A platform where artists and crafters share their work and inspire others.
- YouTube: A wealth of video tutorials and demonstrations from experienced crafters and artists.
Explore Other Brands and Resources
While I love Sweet Pea Stamps, there are many other amazing brands and resources out there. Here are a few of my favorites:
- Stampington & Company: A leading publisher of craft magazines and books.
- Simon Says Stamp: A popular brand of high-quality stamps and dies.
- Altenew: A well-known brand of stamps, dies, and paper crafting supplies.
Join Our Community and Share Your Creations
We’d love to see what you’re working on! Join our community forum to connect with fellow crafters, share your projects, and get feedback and support.
Happy crafting!
Simple and Creative Ways to Use DIY Stamps for Making Personalized Greeting Cards
Elevate your handmade greeting cards with these simple and creative DIY stamp projects.
-
Project 1: Custom Monogrammed Cards
Create custom monogrammed cards using our alphabet stamps and a variety of ink colors. Simply arrange the letters to spell out the recipient’s name or initials, and add a personal touch to your greeting card.
-
Project 2: Nature-Inspired Patterns
Add a touch of nature to your greeting cards with our leaf and flower-shaped stamps. Use a combination of green and brown ink to create a realistic foliage pattern, or experiment with bold colors to create a fun and playful design.
-
Project 3: Geometric Designs
Create geometric patterns using our shape stamps, such as circles, squares, and triangles. Experiment with different color combinations and arrangements to create unique and eye-catching designs.
-
Project 4: Quote and Phrase Stamps
Add a meaningful quote or phrase to your greeting card using our quote and phrase stamps. Choose from a variety of inspirational quotes, funny sayings, or heartfelt messages to express your feelings.
-
Project 5: Photo Transfer Technique
Transfer a favorite photo onto your greeting card using our photo transfer technique. This creates a beautiful and personalized image that will make your card truly special.
-
Project 6: Watercolor Effect
Achieve a watercolor effect on your greeting card using our spray ink and a sponge. This creates a soft, dreamy look that is perfect for spring and summer-themed cards.
-
Project 7: Texture and Dimension
Add texture and dimension to your greeting card using our embossing powder and a heat gun. Create intricate designs and patterns that will catch the eye and add visual interest.
-
Project 8: Color Blocking
Create a colorful and modern design on your greeting card using our color blocking technique. Divide the card into sections and fill each section with a different color to create a striking and eye-catching effect.
-
Project 9: Pattern Mixing
Mix and match different patterns on your greeting card using our various stamp sets. Combine stripes, polka dots, and florals to create a unique and visually appealing design.
-
Project 10: Seasonal Themes
Create seasonal-themed greeting cards using our holiday-specific stamp sets. From Christmas trees to Easter eggs, we have a wide range of stamps to help you celebrate every occasion.
At Sweet Pea Stamps, we’re passionate about helping you create unique and personalized greeting cards that reflect your personality and style. With our vast collection of DIY stamp sets and creative techniques, you’ll find endless inspiration for your next handmade card project.
Adding Custom Stamping Details to Handmade Greeting Cards
Elevate your handmade greeting cards with these simple yet effective stamping ideas.
-
Stamping Techniques
Experiment with various stamping techniques to add unique textures and patterns to your cards.
- Try layering different colors and patterns to create intricate designs.
- Use a sponge or foam applicator to add subtle texture and dimension.
- Experiment with embossing and debossing techniques for added visual interest.
-
Custom Stamp Design
Create your own custom stamps using materials like rubber, foam, or even household items.
- Carve your design into a block of rubber or foam for a unique look.
- Use everyday objects like leaves, flowers, or fabric scraps to create custom stamps.
- Design your own stamp using software or apps for a digital approach.
-
Stamp Placement and Arrangement
Play with placement and arrangement to add visual interest and balance to your card.
- Experiment with symmetrical and asymmetrical arrangements for a unique look.
- Use negative space to create a clean and minimalist design.
- Balance bold images with delicate details for a harmonious composition.
-
Additional Embellishments
Add extra flair with embellishments like ribbons, buttons, or die-cuts.
- Choose materials that complement your stamping design for a cohesive look.
- Experiment with different textures and colors to add depth and interest.
- Keep it simple with a single statement piece or go bold with multiple embellishments.
Getting Started with Stamping
Invest in a few basic supplies and get started with stamping today!
- Purchase a starter kit or individual stamps and ink pads.
- Practice stamping on scrap paper before moving to your actual card.
- Watch tutorials and online classes for tips and inspiration.
Staying Inspired
Follow fellow crafters and designers for inspiration and motivation.
- Join online communities and forums for sharing ideas and feedback.
- Participate in challenges and contests to stay engaged and motivated.
- Visit local craft stores and attend workshops for hands-on learning.
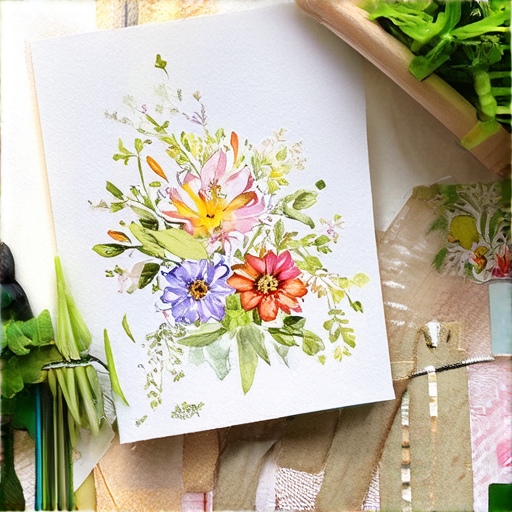
Easy DIY Stamping Techniques for Beginners
I’m excited to share my favorite simple stamping ideas and techniques for creating unique and personalized handmade cards.
-
Technique 1: Basic Stamping
Start with basic stamping by applying ink to a rubber stamp and stamping it onto your card. Experiment with different ink colors and stamp designs to create unique patterns.
-
Technique 2: Layering
Add depth and interest to your cards by layering different images and textures. Use a combination of small and large stamps to create a visually appealing design.
-
Technique 3: Masking
Create intricate designs by masking certain areas of your card with tape or stickers. Apply ink to the exposed areas and remove the mask to reveal a crisp, clean image.
-
Technique 4: Embossing
Add texture and dimension to your cards by embossing images or patterns. Use a heat gun or embossing tool to raise the design and create a raised effect.
-
Technique 5: Watercolor
Add a touch of elegance to your cards by incorporating watercolor techniques. Use a brush or sponge to apply water-based ink and blend colors for a soft, watercolor effect.
These easy DIY stamping techniques are perfect for beginners looking to create unique and personalized handmade cards. With a little practice and experimentation, you can create stunning designs that showcase your creativity and style.
Recommended Resources:
- Sweet Pea Stamps: A creative resource and community hub dedicated to inspiring crafters, DIY enthusiasts, and stamp collectors.
- Paper Crafting Tutorials: Find inspiration and learn new techniques with our extensive collection of paper crafting tutorials and videos.
- Stamp Collectors Community: Join our online community to connect with fellow stamp enthusiasts, share tips and tricks, and showcase your creations.
Get Started Today!
With these simple stamping ideas and techniques, you’re ready to start creating unique and personalized handmade cards. Visit our website for more inspiration, tutorials, and resources to help you take your card-making skills to the next level.
Simple and Versatile DIY Stamping Methods for Beautiful Handmade Cards
I’m excited to share my favorite DIY stamping methods for creating unique and beautiful handmade cards.
- Method 1: Watercolor Stamping
- Method 2: Embossing Powder Stamping
- Method 3: Resist Stamping
- Method 4: Layered Stamping
- Method 5: Stencil Stamping
This technique involves using watercolor paints to create soft, blended colors on your stamped images. To get started, simply apply a small amount of watercolor paint to your stamp and stamp onto your paper. Experiment with different brush strokes and layering techniques to achieve unique effects.
Embossing powder adds a fun texture to your stamped images. Apply embossing powder to your stamp and heat set with a heat tool. This creates a raised, dimensional effect that adds visual interest to your cards.
Resist stamping involves applying a resist medium, such as wax or varnish, to your stamp before stamping onto your paper. This creates a fun, textured effect that resists ink or paint. Try using different resist mediums and stamping techniques to achieve unique effects.
Layered stamping involves building up layers of color and texture to create complex, dimensional designs. Start with a base layer of ink or paint, then add additional layers using different stamping techniques and materials. Experiment with different combinations to achieve unique effects.
Stencil stamping involves using stencils to create intricate, detailed designs. Cut out shapes from acetate or cardstock and place over your stamped image. Use a sponge or brayer to apply ink or paint through the stencil, creating a crisp, clean design.
Additional Tips and Resources
For more inspiration and tips on DIY stamping, check out these resources:
Get Creative with DIY Stamping!
Remember, the possibilities are endless when it comes to DIY stamping! Experiment with different techniques, materials, and designs to create unique and beautiful handmade cards that reflect your personal style.
Basic Materials Needed for Simple and Effective DIY Stamp Designs
To create simple and effective DIY stamp designs for handmade cards, you’ll need the following basic materials:
- Stamps: You can start with a set of basic rubber or photopolymer stamps featuring simple shapes, patterns, and textures.
- Ink Pads: Choose high-quality ink pads in a variety of colors to match your design theme.
- Paper: Select a sturdy paper or cardstock suitable for stamping, cutting, and shaping into intricate designs.
- Craft Knife: A sharp craft knife is essential for cutting out intricate designs and shapes from paper or cardstock.
- Scissors: Use sharp scissors for cutting out smaller details and shapes.
- Tape Runner: A tape runner helps secure your stamped images onto your handmade cards.
- Adhesive: Choose a strong adhesive, such as glue or double-sided tape, to attach embellishments and decorations.
- Embellishments: Add a personal touch with ribbons, buttons, or other decorative items.
- Design Tools: Utilize stencils, masks, or other design tools to enhance your stamping technique and create unique effects.
- Stamp Positioner: A stamp positioner ensures precise placement of your stamps, reducing smudging and errors.
- Stamp Cleaner: Keep your stamps clean and free of debris with a gentle stamp cleaner.
Additional Tips and Resources
For more inspiration and guidance, visit our blog for tutorials, tips, and project ideas.
Explore our stamp collections for a wide range of designs and themes.
Join our community to connect with fellow crafters, share ideas, and learn from experts.
0 Comments