

For those who find solace in the world of creativity and self-expression, exploring the realm of art supplies for stamping can unlock a wealth of possibilities and open doors to new forms of artistic expression. Whether you’re a seasoned artist or just starting out, having access to the right tools and materials can make all the difference in bringing your unique vision to life.
Getting Started with Stamping
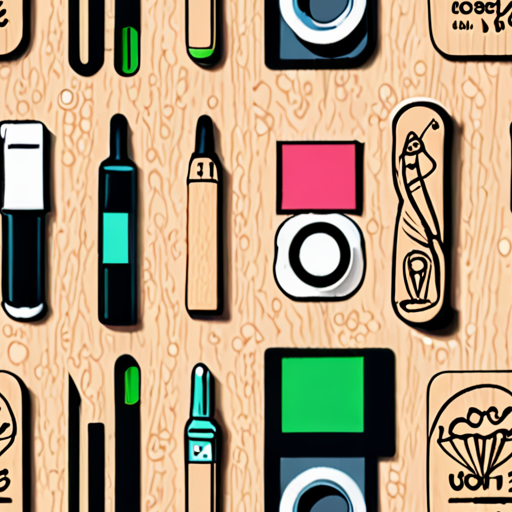
To begin stamping, you’ll need a few essential supplies. As a crafter, I always recommend investing in high-quality materials to ensure the best results. Here’s what you’ll need to get started:
- Paper cutter: A paper cutter is a must-have for any stamper. It allows you to cut intricate designs and shapes with precision.
- Adhesive: Choose a reliable adhesive that suits your needs, whether it’s glue, tape, or a spray adhesive.
- Shammy or cleaning cloth: Keep your stamps clean and free of debris with a shammy or cleaning cloth.
- Good scissors: Invest in a pair of sharp, high-quality scissors that can handle various types of paper and cardstock.
- Stamps: Of course, you’ll need a variety of stamps to get started! Consider investing in a starter set or building your collection gradually.
- Ink pads: Ink pads come in a range of colors and finishes. Experiment with different textures and effects to find your favorite.
- Craft mat: A craft mat provides a smooth surface for stamping and helps prevent messes.
- Cardstock or paper: Stock up on high-quality cardstock or paper to use with your stamps.
As a member of the Sweet Pea Stamps community, I’m excited to share my passion for stamping with you. Whether you’re a seasoned crafter or just starting out, our website offers a wealth of resources and inspiration to help you grow your skills.
Exploring the World of Stamping
At Sweet Pea Stamps, we believe that stamping is an art form that requires patience, creativity, and practice. Our team is dedicated to providing you with the tools and knowledge you need to succeed.
- Stamp Tutorials : Learn the basics of stamping and advanced techniques from our expert team.
- Community Forum : Connect with fellow crafters, ask questions, and share your creations.
- Blog : Stay up-to-date on the latest trends, tips, and product releases.
Join the Sweet Pea Stamps Community Today!
We invite you to join our vibrant community of crafters and explore the world of stamping together. With our extensive library of tutorials, inspiring blog posts, and supportive community forum, you’ll find everything you need to take your stamping skills to the next level.
Stamping Equipment
As a crafter and DIY enthusiast, I’m often asked what equipment is used for stamping.
- Mechanical presses are commonly used for sheet metal stamping due to their high precision and speed.
- Hydraulic presses offer greater force and versatility, making them ideal for heavy-duty applications.
- CNC step presses combine the benefits of mechanical and hydraulic presses, providing precise control and high-speed production.
- CNC turret punch presses are designed for high-volume production, featuring interchangeable tooling and automated processes.
- Sheet metal bending machines are used for forming complex shapes and curves in sheet metal.
- Plate rolling machines are used for producing cylindrical shapes and profiles in sheet metal.
- Bending machines are versatile tools used for shaping and forming various materials, including metal, wood, and plastic.
- Cold bending forming machines are used for shaping and forming metal parts without heat, reducing distortion and warping.
- Hammer forming machines are used for shaping and forming metal parts using a combination of pressure and impact.
I’ve worked with many of these machines during my crafting journey, and I can attest to their effectiveness and efficiency.
When choosing the right equipment for your stamping needs, consider factors such as material type, thickness, and desired finish.
For example, if you’re working with thin metal sheets, a mechanical press may be sufficient, while thicker materials may require a hydraulic press.
Ultimately, the choice of equipment depends on your specific project requirements and personal preferences.
At Sweet Pea Stamps, we offer a variety of crafting supplies and tools to help you get started with your next project.
Visit our website to explore our selection of stamps, dies, and other crafting essentials.
Learn More About Our Crafting Supplies
We also recommend checking out other reputable brands in the industry, such as:
Hobby Lobby and Michaels , which offer a wide range of crafting supplies and tools.
Remember to always follow safety guidelines and manufacturer instructions when operating any equipment.
Happy crafting!

Can You Use Acrylic Ink for Stamping?
Ink pads that are permanent and not water-reactive have been a staple in the world of stamping for years.
- The good news is that you can indeed use acrylic ink for stamping, and I’ve had great success with it myself.
- To get started, you’ll need a large acrylic block and a brayer to apply a thin layer of paint to your stamp.
- I recommend experimenting with different colors and techniques to find what works best for you.
Sweet Pea Stamps offers a variety of acrylic blocks and brayers specifically designed for stamping, making it easy to get started.
If you’re looking for alternative options, there are several other brands available on the market, such as Ranger Ink and Tim Holtz.
When it comes to choosing the best ink for your needs, consider factors such as color palette, consistency, and durability.
Some popular alternatives to acrylic ink include:
- Dye-based inks, which offer a wide range of colors and blending capabilities.
- Pigment-based inks, which provide rich, vibrant colors and excellent lightfastness.
- Water-based inks, which are perfect for delicate designs and subtle color shifts.
Ultimately, the choice of ink depends on your personal preference and the specific project you’re working on.
At Sweet Pea Stamps, we’re committed to helping you find the perfect tools and supplies for your creative journey.
Whether you’re a seasoned stamper or just starting out, our team is always happy to offer advice and support.
So why not give acrylic ink a try today and see the amazing things you can create?

The Best Material for Stamp Making
When it comes to choosing the best material for stamp making, there are several options available, each with its own unique characteristics and benefits.
- Solid Rubber:
- Gasket Material:
- Epoxy Resin:
- Polyurethane:
Solid rubber is a popular choice among stamp makers due to its durability and versatility. It can be easily carved into intricate designs and patterns, making it ideal for creating custom stamps. There are several types of solid rubber available, including eraser rubber and rubber specifically designed for stamp carving.
Gasket material is another option for stamp making, although it can be more challenging to work with than solid rubber. It is often less expensive than solid rubber and can be found at hardware stores like Home Depot. However, it may require more effort to carve and shape into the desired design.
Epoxy resin is a strong and durable material that can be used to create high-quality stamps. It is easy to mix and apply, and can be molded into complex shapes and designs. Epoxy resin is a great option for those who want to create custom stamps with intricate details.
Polyurethane is a flexible and versatile material that can be used to create a variety of stamps, from simple designs to complex patterns. It is easy to work with and can be molded into different shapes and sizes.
Ultimately, the best material for stamp making depends on personal preference and the type of project you are working on. Each material has its own unique characteristics and benefits, and experimenting with different materials can help you find the one that works best for you.
Choosing the Right Material for Your Needs
When selecting a material for stamp making, consider the following factors:
- Durability:
- Versatility:
- Cost:
- Ease of Use:
Choose a material that can withstand regular use and handling.
Select a material that can be easily carved and shaped into different designs and patterns.
Consider the cost of the material and whether it fits within your budget.
Choose a material that is easy to work with and requires minimal effort to carve and shape.
Tips for Working with Different Materials
Here are some tips for working with different materials:
- Solid Rubber:
- Gasket Material:
- Epoxy Resin:
- Polyurethane:
Use a sharp tool to carve and shape the rubber, and apply pressure evenly to avoid damaging the material.
Apply heat to soften the material before carving and shaping, and use a sharp tool to avoid tearing the material.
Mix the epoxy resin according to the manufacturer’s instructions, and apply it to a surface using a brush or pouring technique.
Apply polyurethane to a surface using a brush or spraying technique, and allow it to dry completely before handling.
What Material Is Used for Stamping?
As a crafter and DIY enthusiast, I’m often asked what type of material is used for stamping.
- Steel is one of the most common metal stamping materials due to its strength and versatility.
- Steel can be alloyed with various other metals to enhance specific physical properties, making it ideal for a wide range of applications.
- Additionally, steel can be treated before or after the metal stamping process to increase hardness or corrosion resistance.
Sweet Pea Stamps offers a variety of high-quality metal stamping tools and supplies, perfect for crafting and DIY projects.
Metal Stamping Materials Explained
When it comes to metal stamping, the choice of material is crucial to achieving the desired outcome.
- Steel: As mentioned earlier, steel is a popular choice for metal stamping due to its strength and durability.
- Copper: Copper is another commonly used metal stamping material, known for its excellent conductivity and malleability.
- Aluminum: Aluminum is a lightweight yet strong metal stamping material, often used in decorative and functional applications.
At Sweet Pea Stamps, we offer a range of metal stamping materials and tools to suit your needs, whether you’re a seasoned crafter or just starting out.
Choosing the Right Metal Stamping Material
With so many options available, choosing the right metal stamping material can seem overwhelming.
- Consider the intended use of your project and choose a material that suits your needs.
- Think about the level of detail and precision required for your design.
- Don’t hesitate to reach out to our team for advice and guidance on selecting the perfect metal stamping material for your project.
We hope this helps you understand the world of metal stamping and inspires you to create something amazing!

Creating Professional Stamps at Home
To make professional-looking stamps at home, you’ll need a few basic materials and some simple tools.
- Materials: Acrylic or rubber sheets, ink pads, and a cutting tool
- Tools: A craft knife, scissors, and a ruler
Designing Your Stamp
Start by designing your stamp image using a computer program or drawing software. Keep in mind that the design should be reversed, as it will appear when printed onto the stamp.
- Create a digital version of your design using a graphics editor or drawing software.
- Reverse the design by flipping it horizontally or using a mirror effect.
- Save the design as a high-resolution image file.
Cutting Out Your Design
Once you have your design ready, cut out the shape using a craft knife or scissors. Make sure to cut carefully and accurately to avoid mistakes.
- Place the acrylic or rubber sheet on a stable surface.
- Position the design on the sheet, aligning it with the edges.
- Use a craft knife or scissors to carefully cut out the design.
Inking Your Stamp
Now that you have your stamp cut out, it’s time to ink it. Use a high-quality ink pad specifically designed for stamping.
- Select a suitable ink pad for your stamp material.
- Apply a small amount of ink to the stamp, making sure to cover the entire surface.
- Gently wipe off excess ink with a cloth or paper towel.
Tips and Variations
Experiment with different materials, designs, and inking techniques to create unique and professional-looking stamps.
- Try using different types of ink, such as metallic or glitter ink.
- Experiment with various stamp sizes and shapes.
- Combine multiple stamps to create intricate designs.
Conclusion
With these simple steps and tips, you can create professional-looking stamps at home. Experiment with different materials and techniques to develop your skills and style.
0 Comments