Transforming your living space into a masterpiece has never been easier, thanks to the versatility of DIY home decor with stamps. By leveraging this simple yet effective technique, you can unlock endless creative possibilities and breathe new life into your interior design. From adding subtle patterns to bold statements, stamping offers a world of artistic expression that’s both accessible and affordable.
What Can You Make With Stamps?
You can make a variety of creative projects with stamps, from functional items to decorative pieces.
- Cards and Gift Tags: Use your favorite stamps to create personalized greeting cards, gift tags, and invitations.
- Notebooks and Journals: Add a personal touch to your notebooks and journals with custom stamps.
- Fabric Paintings: Experiment with fabric paint and stamps to create unique textile art pieces.
- Decorative Envelopes: Stamp your envelopes with fun designs and patterns to add a personal touch.
- Custom Erasers:
- Create your own custom erasers using our DIY tutorial.
- Add a personal touch to your school supplies with custom-stamped erasers.
- Textile Art: Combine stamps with fabric paint to create intricate and colorful textile art pieces.
- Wall Art: Use large-scale stamps to create unique wall art pieces that add personality to any room.
- Gift Wrapping: Stamp your gifts with custom designs and patterns to make them extra special.
- Party Decorations: Use stamps to create custom party decorations, such as banners and garlands.
At Sweet Pea Stamps, we’re passionate about helping you unleash your creativity and bring your ideas to life. Explore our collection of unique stamps and get inspired to create something amazing!
Painting with Stamps: A Step-by-Step Guide
To get started with painting with stamps, gather your materials and choose a design or pattern to work with.
- Materials Needed:
- Clean and dry surface to work on
- Stamps (rubber or foam)
- Ink pads or paint
- Bonus tip: Experiment with different ink colors and textures for unique effects!
Preparing Your Stamps
Before you begin, make sure your stamps are clean and free of debris. If using rubber stamps, apply a thin layer of ink or paint to the image area. For foam stamps, simply dip them into the ink or paint and wipe off excess.
- Choose a design or pattern to work with
- Select the color(s) you want to use
- Apply ink or paint to the stamp
- Gently press the stamp onto your surface, applying gentle pressure
- Experiment with different stamping techniques, such as layering or combining images
Tips and Variations
Don’t be afraid to experiment and try new things! Some popular variations include:
- Mixing media: Combine paint, markers, or colored pencils with your stamped designs for added texture and interest
- Layering: Build up layers of color and pattern to create intricate, multi-dimensional designs
- Collage: Use your stamped images as a base and add additional elements, such as paper cutouts or fabric scraps
Getting Creative with Stamping
The possibilities are endless when it comes to painting with stamps! Try incorporating different shapes, patterns, and textures to create unique and eye-catching designs.
- Experiment with different stamp sizes and shapes
- Combine stamps with other art supplies, such as stencils or masks
- Try stamping on non-traditional surfaces, like wood or fabric
Finishing Touches
Once you’ve completed your design, consider adding a few finishing touches to enhance the overall look and feel.
- Add a coat of varnish or sealant to protect your artwork
- Frame or mount your piece for display
- Consider adding a personal message or signature to make it extra special
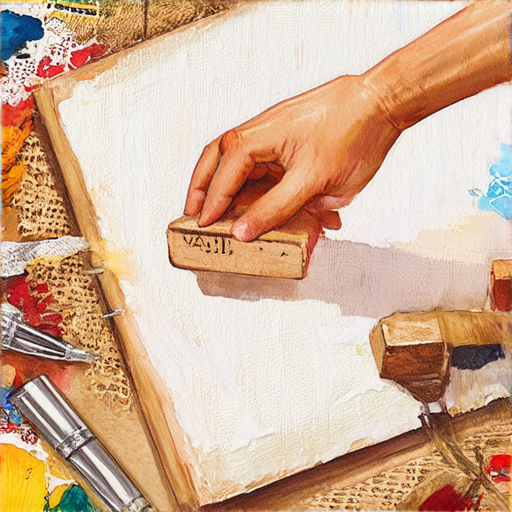
Creating Unique Stamp Wall Art
At Sweet Pea Stamps, we’re passionate about helping you unleash your creativity and bring your vision to life.
-
Step 1: Gather Materials
- Stamps from Sweet Pea Stamps or other reputable brands
- Ink pads in a range of colors
- Paper or canvas specifically designed for stamping
- A surface to work on, such as a table or desk
- A sealant or varnish to protect your artwork
-
Step 2: Plan Your Design
- Determine the size and shape of your artwork
- Choose a color scheme and select the stamps you’ll use
- Consider adding embellishments, such as glitter or rhinestones
-
Step 3: Apply Ink and Stamp
- Select the ink pad you want to use and apply a small amount to the stamp
- Gently press the stamp onto the paper or canvas, making sure to cover the entire image
- Repeat the process with different stamps and colors to create a unique design
-
Step 4: Add Embellishments and Seal
- Add embellishments, such as glitter or rhinestones, to give your artwork extra sparkle
- Apply a sealant or varnish to protect your artwork and make it last longer
-
Step 5: Display Your Masterpiece
- Hang your artwork in a prominent location, such as a living room or bedroom
- Consider framing your artwork to add an extra touch of elegance
- I’ve found that using stamps on walls can be a fun and creative way to add some personality to a room.
- However, before you start stamping away, there are a few things to consider.
You’ll need a variety of materials to get started, including:
Before you start stamping, take some time to plan out your design.
Now it’s time to apply ink to your stamps and start stamping!
Once you’ve completed your design, it’s time to add any final touches.
The final step is to display your beautiful stamp wall art!
We hope these steps have inspired you to create your own unique stamp wall art. At Sweet Pea Stamps, we’re always excited to see what our customers come up with!
Can You Use Stamps on Walls?
As a crafter and DIY enthusiast, I’m always excited to explore new ways to decorate my space.
The Benefits of Using Acrylic Paints
If you’re planning to use stamps on walls, acrylic paints are a great option.
- They’re easy to apply and dry quickly, making them perfect for a quick decorating fix.
- Acrylic paints are also relatively inexpensive compared to other types of paint.
- And, if you decide you don’t like the design, it’s easy to paint over with a fresh coat.
Other Options to Consider
While acrylic paints are a popular choice for wall stamping, there are other options available.
- Fabric paint can be used to create unique and textured designs.
- Mixed media art supplies can add an extra layer of interest to your stamped design.
Tips for Successful Wall Stamping
To get the most out of your wall stamping project, be sure to:
- Choose the right type of paint for your surface.
- Select a design that complements the style of your room.
- Experiment with different stamping techniques to achieve unique effects.
Conclusion
With a little creativity and experimentation, you can create beautiful and unique designs using stamps on walls.
Remember to choose the right materials and techniques for your project, and don’t be afraid to try new things!
Displaying Stamps on the Wall
As a passionate crafter and collector, I’m excited to share my expertise on how to beautifully showcase your beloved stamps.
-
Choose the Right Frame
-
Protect Your Stamps
-
Creativity Unleashed
-
Showcase Your Masterpiece
-
Join Our Community
-
Get Creative with Sweet Pea Stamps
Select a frame that complements the colors and design of your stamps. A colorful mat board can enhance the visual appeal, while a white mat board provides optimal contrast.
To prevent damage, consider using stamp mounts or stamp hinges, which are plastic sleeves with adhesive backing. These protective measures will keep your stamps safe and secure.
Sweet Pea Stamps offers a variety of creative resources and inspiration for crafters and collectors alike. Explore our engaging blog, featuring unique craft ideas, DIY tutorials, and innovative project inspirations.
Create a stunning display by combining your favorite stamps with other decorative items, such as ribbons, buttons, or other embellishments. Get inspired by visiting our customer gallery, where you’ll find beautiful examples of personalized projects created with Sweet Pea’s stamps.
Connect with fellow crafters and collectors through our craft forums, seasonal stamp collections, and upcycling projects that promote sustainability. Share your creations and learn from others in our vibrant online community.
Discover the endless possibilities of crafting with Sweet Pea Stamps. From beginner-friendly tutorials to advanced techniques, we have everything you need to unleash your creativity and bring your ideas to life.
For more information on displaying stamps on the wall, visit our website at Sweet Pea Stamps.

Can Stamps be Used with Paint?
At Sweet Pea Stamps, we’re often asked whether our beautiful stamps can be used with paint.
- We’re happy to report that yes, our stamps can indeed be used with paint!
- In fact, many of our customers love combining our stamps with paint to create unique and eye-catching designs.
How to Use Stamps with Paint:
- Clean your stamps thoroughly before painting to prevent any residue from affecting the paint.
- Select a high-quality paint that adheres well to your chosen surface.
- Apply a thin layer of paint to your stamp, making sure to cover the entire design.
- Gently press the stamp onto your surface, applying gentle pressure to avoid smudging the paint.
- Lift the stamp off carefully to reveal your beautifully painted design.
Tips and Tricks:
- To achieve the best results, use a paint specifically designed for use with stamps.
- If you find that your paint is too thick, try adding a small amount of water to thin it out.
- For intricate designs, consider using a smaller brush to apply the paint and achieve more precise control.
Get Creative with Paint and Stamps:
Don’t be afraid to think outside the box and experiment with different combinations of paint and stamps.
- Try pairing bold, bright paints with delicate stamps for a striking contrast.
- Use metallic paints to add a touch of luxury and sophistication to your designs.
- Experiment with texture by mixing paint with other materials, such as glitter or sand.
Join Our Community:
Want to see more amazing examples of paint and stamp combinations? Join our community today and share your own creations with us!

0 Comments