
As the holiday season approaches, many of us find ourselves scrambling to find the perfect gift for our loved ones, but often overlook one crucial aspect – the presentation. A beautifully wrapped gift can elevate the entire experience, making it a truly special moment for both the giver and receiver. With a few simple gift wrapping tips, you can transform your humble presents into stunning works of art that exude elegance and sophistication. From mastering the basics of how to wrap a present to adding a personal touch without breaking the bank, we’ll explore the essential tools, materials, and techniques needed to create visually appealing and professionally wrapped presents.
Polish Your Gift Giving with These Simple yet Elegant Wrapping Techniques
As a crafter and DIY enthusiast, I’m always looking for ways to elevate my gift-giving game and make it more special for my loved ones. One of the easiest ways to do this is by mastering the art of gift wrapping. With a few simple techniques and some beautiful paper, you can create stunning presents that will leave a lasting impression. Here are some of my favorite tips and tricks for making your gifts look more polished and professional:
- Select the Right Paper: Choose a high-quality wrapping paper that complements the occasion and the recipient’s style. Consider using textured papers, metallic foils, or even handmade papers for added visual interest.
- Create a Focal Point: Use ribbons, bows, or embellishments to draw attention to the gift. A beautifully tied bow or a delicate ribbon can add a touch of elegance to even the simplest present.
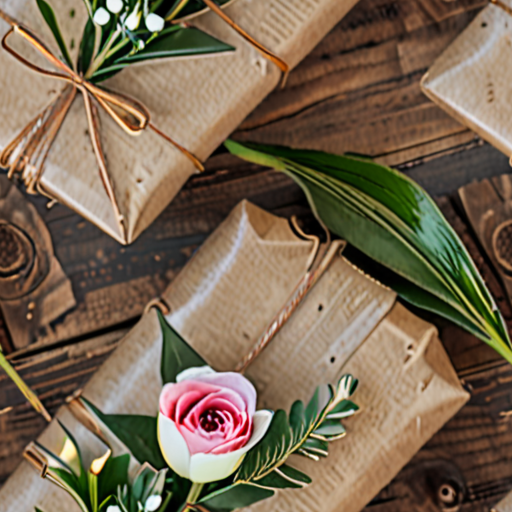
- Add Some Greenery: Fresh flowers, branches, or greenery can add a pop of color and texture to your gifts. Simply tie them around the box or attach them to the ribbon for a beautiful and effortless look.
- Embellish with Stickers or Decals: Add a personal touch to your gifts with custom stickers or decals. You can find a wide variety of designs and patterns online or create your own using a printer and some cardstock.
- Get Creative with Tying: Experiment with different tying techniques, such as the classic bow or the more intricate French twist. You can also use twine, yarn, or even fabric strips to add texture and interest to your gifts.
- Pay Attention to Details: Make sure to wrap the gift neatly and evenly, leaving no wrinkles or creases behind. A well-wrapped gift is a sign of thoughtfulness and care.
- Make it Personal: Add a handwritten note or a small memento to the gift to make it extra special. This could be a photo, a quote, or even a small piece of jewelry.
By incorporating these simple yet elegant wrapping techniques into your gift-giving routine, you’ll be able to create stunning presents that will impress your loved ones and leave a lasting impression. Happy crafting!
Adding a Personal Touch to Your Gift Wrapping
I’m always excited to share my favorite budget-friendly gift wrapping ideas that can elevate your presents without breaking the bank.
- Get Creative with Recycled Materials: Think outside the box and repurpose items like old maps, music sheets, or newspaper clippings to create unique and eco-friendly wrapping paper.
- DIY Embellishments: Use natural materials like leaves, twigs, or flowers to add a personal touch to your gifts. You can also use fabric scraps, ribbons, or lace to create beautiful embellishments.
- Handmade Tags: Design and print your own gift tags using cardstock, stickers, or washi tape. You can also add a personal message or the recipient’s name to make it extra special.
- Gift Boxes: Upcycle old boxes or purchase inexpensive ones to create a beautiful presentation. Decorate them with paint, markers, or decoupage to give them a personalized look.
- Fabric Wrapping: Use scarves, bandanas, or fabric remnants to wrap your gifts. Simply tie a knot or use a ribbon to secure the fabric in place.
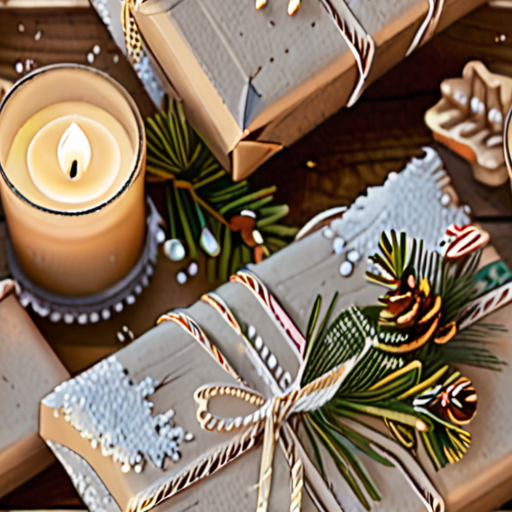
- Nature-Inspired Accents: Collect pinecones, acorns, or seashells to add a natural element to your gifts. You can also use dried flowers or herbs to create a beautiful arrangement.
- Personalized Messages: Write a heartfelt note or a funny quote to make your gifts extra special. You can also use a marker or a pen to draw a simple design or pattern.
- Themed Wrapping: Create themed wrapping paper or decorations based on the occasion or the recipient’s interests. For example, you can use sports-themed wrapping paper for a sports enthusiast or holiday-themed decorations for a festive occasion.
- Upcycled Ornaments: Transform old ornaments into beautiful gift toppers or decorations. You can use glue, glitter, or paint to give them a personalized look.
- Gift Baskets: Create a gift basket filled with goodies like chocolates, nuts, or teas. You can also add a personal touch by including a handwritten note or a small memento.
Remember, the most important thing is to have fun and be creative!
Some of My Favorite Resources Include:
- Pinterest for inspiration and ideas
- YouTube for tutorials and DIY videos
- Etsy for unique and handmade items
Happy Crafting!
Mastering the Art of Gift Wrapping
As a crafter and DIY enthusiast, I’m excited to share my expertise on how to beautifully wrap gifts like a pro.
-
Step 1: Gather Essential Supplies
To get started, you’ll need high-quality wrapping paper, a sturdy gift box, decorative tape, scissors, and a bone folder.
-
Step 2: Choose the Perfect Paper
Select a wrapping paper that complements the occasion and the recipient’s style. Consider texture, pattern, and color when making your selection.
-
Step 3: Measure and Cut the Paper
Measure the gift carefully and cut the wrapping paper to size, leaving enough excess for a crisp fold.
-
Step 4: Create a Crisp Fold
Use a bone folder to create a sharp crease in the paper, ensuring a smooth and professional finish.
-
Step 5: Add Decorative Touches
Add embellishments such as ribbons, bows, or gift tags to give your gift a personal touch.
-
Step 6: Finish with Flair
Secure the wrapping paper with decorative tape and fluff out any wrinkles for a polished look.
By following these simple steps, you’ll be well on your way to becoming a gift-wrapping pro. Remember to experiment with different techniques and supplies to find what works best for you.
For more inspiration and creative ideas, check out our blog or explore our collection of stamps and paper .
Happy crafting!

Effective Gift Wrapping Techniques for Visually Appealing Presents
Elevate your gift-giving game with our expert guide to stunningly beautiful presents.
- Mastering the Art of Gift Wrapping: To create visually appealing and professionally wrapped presents, start by selecting high-quality wrapping paper that complements the occasion and the recipient’s style.
- Selecting the Perfect Paper: Consider factors such as texture, pattern, and color when choosing wrapping paper. For example, metallic paper can add a touch of luxury, while textured paper can add depth and interest.
- Crafting a Beautiful Bow: A well-crafted bow can elevate the overall look of your gift. Use ribbon or twine to create a bow that complements the wrapping paper and adds a personal touch.
- Adding Embellishments: Embellishments such as gift tags, ribbons, and bows can add a finishing touch to your gift. Choose items that complement the wrapping paper and add a personal touch.
- Creating a Cohesive Look: To create a cohesive look, consider using a consistent theme or color scheme throughout the gift. This can include matching ribbons, bows, and embellishments.
- Pay Attention to Details: Pay attention to details such as folding, creasing, and tucking to create a polished and professional finish.
- Experiment with Different Techniques: Don’t be afraid to experiment with different techniques and styles to find what works best for you. Practice makes perfect, and you’ll soon become a pro at gift wrapping!
- Get Creative with Materials: Think outside the box and get creative with materials such as fabric, lace, and even recycled materials. This can add a unique and personal touch to your gifts.
- Make it Personal: Make your gifts personal by adding a handwritten note or card. This shows you care and puts thought into the gift.
- Practice Makes Perfect: As with any skill, practice makes perfect. Experiment with different techniques and styles until you find what works best for you.
Popular Gift Wrapping Styles
- Furoshiki Wrapping: Furoshiki wrapping is a Japanese technique that involves wrapping a gift in a square piece of cloth. This creates a beautiful and elegant presentation.
- Kraft Paper Wrapping:
- Gift Bag Wrapping: Gift bag wrapping is a great option for larger gifts or those with irregular shapes. Simply place the gift in a gift bag and tie the top with a ribbon or twine.
- Origami Wrapping: Origami wrapping involves folding paper to create intricate designs and patterns. This adds a unique and creative touch to your gifts.
Additional Tips and Resources
For more inspiration and guidance, check out these resources:
- Google Search Results
- Pinterest Gift Wrapping Ideas
- YouTube Gift Wrapping Tutorials
Key Mistakes to Avoid When Gift Wrapping
To achieve a beautiful, professional finish, it’s essential to steer clear of common pitfalls that can ruin your gift-wrapping efforts.
-
Inadequate Measuring
Failing to measure your gift accurately can lead to insufficient wrapping paper, resulting in awkward folds and creases.
-
Insufficient Tape
Not using enough tape can cause the wrapping paper to come undone, leaving your gift looking sloppy and unprofessional.
-
Poor Bow Placement
A poorly placed bow can detract from the overall appearance of your gift, making it look amateurish and lacking in finesse.
-
Overcrowding the Gift Box
Adding too many embellishments to your gift box can make it look cluttered and overwhelming, rather than elegant and sophisticated.
-
Lack of Attention to Detail
Failing to pay attention to small details, such as uneven edges or mismatched patterns, can make your gift-wrapping look haphazard and unpolished.
Improving Your Gift-Wrapping Skills
To take your gift-wrapping to the next level, try these expert tips:
-
Practice, Practice, Practice
The more you wrap gifts, the more comfortable you’ll become with different techniques and materials.
-
Invest in Quality Tools
A good pair of scissors, a reliable tape dispenser, and a sturdy cutting mat can make all the difference in achieving a professional finish.
-
Experiment with Different Materials
Don’t be afraid to try out new textures, colors, and patterns to add visual interest to your gifts.
-
Watch Tutorials and Online Classes
Learning from experienced gift wrappers can help you master new techniques and stay up-to-date with the latest trends.
-
Join a Crafting Community
Connecting with fellow crafters can provide valuable feedback, inspiration, and motivation to continue improving your skills.
Tips for Achieving a Professional Finish
For a truly polished look, remember to:
-
Use High-Quality Wrapping Paper
Choose paper that is durable, easy to work with, and visually appealing.
-
Pay Attention to Folding Techniques
Carefully folding your wrapping paper can create a crisp, clean edge that adds to the overall elegance of your gift.
-
Add a Personal Touch
Incorporating personal touches, such as monograms or special messages, can make your gifts truly unforgettable.
-
Finishing Touches Matter
A well-placed ribbon, a delicate bow, or a sprinkle of decorative accents can elevate your gift-wrapping from ordinary to extraordinary.

Simple yet Impressive Gift Wrapping Ideas for Beginners
Elevate your holiday gift-giving with these easy-to-follow and visually stunning gift wrapping ideas perfect for those just starting out.
- Monochromatic Magic: Create a cohesive look by using different shades of the same color for wrapping paper, ribbons, and bows.
- Faux Stamping: Use paint or markers to create custom designs on plain wrapping paper, giving it a unique and handmade touch.
- Texture Play: Mix and match different textures like velvet, lace, and burlap to add depth and visual interest to your gifts.
- Nature-Inspired: Bring the outdoors in by incorporating natural elements like leaves, twigs, and pinecones into your gift wrapping design.
- DIY Embellishments: Get creative with materials like buttons, sequins, and beads to add a personal touch to your gifts.
- Gift Tag Gallery: Turn your gift tags into mini works of art by decorating them with paint, markers, or stickers.
- Wrap and Repeat: Create a pattern by repeating a design element, like stripes or polka dots, to add visual appeal to your gifts.
- Seasonal Accents: Incorporate seasonal elements like holly, mistletoe, or candy canes to give your gifts a festive feel.
- Personalized Messages: Add a heartfelt touch by including a handwritten note or a customized gift tag with the recipient’s name.
- Recycled Materials: Get eco-friendly by repurposing old maps, music sheets, or book pages to create unique and sustainable gift wraps.
Additional Tips and Tricks:
To take your gift wrapping skills to the next level, try experimenting with different folding techniques, like the accordion fold or the crisscross fold.
Don’t be afraid to mix and match different patterns, textures, and colors to create a truly one-of-a-kind look.
Consider adding a personal touch by incorporating sentimental items, like photos or mementos, into your gift wrapping design.
Conclusion:
With these simple yet impressive gift wrapping ideas, you’ll be well on your way to becoming a pro at elevating your holiday gift-giving game. Remember to have fun and get creative with your wrapping style – after all, it’s the thought that counts!
0 Comments