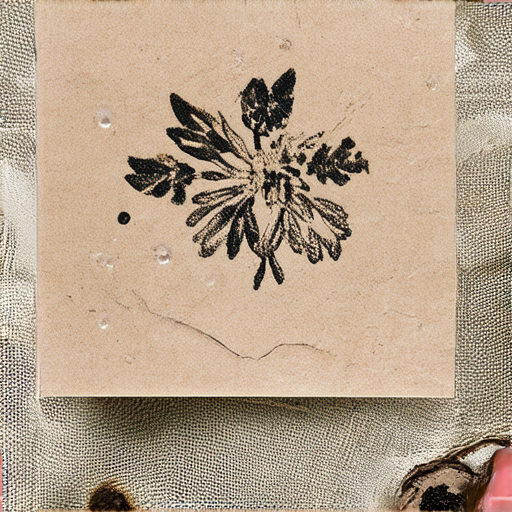
Unlock the full potential of your fabric creations with expert stamper-approved techniques for permanent designs. Whether you’re a seasoned crafter or just starting out, mastering the art of stamping on fabric requires patience, practice, and a solid understanding of the right tools and materials. From choosing the ideal rubber stamp to experimenting with different fabric paints, our comprehensive guide will walk you through the basics of stamping on fabric and take you on a journey to explore advanced methods for creating intricate designs.

Stamping on Fabric: A Step-by-Step Guide
To get started with stamping on fabric, you’ll need a few basic supplies, including rubber stamps, ink pads, and a piece of fabric.
- Choose the Right Fabric: Look for a high-quality cotton or linen fabric that can hold the ink well.
- Select the Perfect Ink Pad: Choose an ink pad that matches the color of your rubber stamp.
- Prepare Your Workspace: Cover your work surface with a protective sheet or old cloth to prevent ink stains.
- Clean and Condition Your Rubber Stamp: Before use, clean your rubber stamp with soap and water, and condition it with a small amount of oil to keep it flexible.
The Stamping Process
- Tauten the Fabric: Stretch the fabric tightly over a flat surface, making sure it’s smooth and wrinkle-free.
- Apply Ink to the Rubber Stamp: Dip the rubber stamp into the ink pad and wipe off any excess ink.
- Position the Rubber Stamp: Place the rubber stamp on the fabric, aligning it carefully with the design you want to create.
- Press Down Gently: Press down on the rubber stamp firmly, applying gentle pressure to avoid smudging the ink.
- Hold for a Few Seconds: Hold the stamp in place for 3-5 seconds to allow the ink to set.
- Lift Off the Stamp: Carefully lift the rubber stamp off the fabric, revealing your beautifully stamped design.
Tips and Variations
- Experiment with Different Inks: Try using different colors and types of ink to create unique effects and textures.
- Add Embellishments: Consider adding embellishments like beads, sequins, or appliques to give your design extra flair.
- Try Layering: Experiment with layering different designs and patterns to create complex, multi-dimensional effects.
Getting Creative with Stamping
With these basics under your belt, you’re ready to start experimenting with stampling on fabric! Don’t be afraid to try new things and push the boundaries of what’s possible. Happy crafting!
Getting Ink to Stay on Fabric
To ensure that ink stays on fabric, it’s essential to understand the properties of the ink and the type of fabric being used.
- Ink Type: Water-based inks are generally easier to work with and more suitable for fabric printing compared to solvent-based inks.
- Fabric Type: Cotton and linen fabrics tend to hold ink well due to their natural texture and absorbency.
- Printing Method: Direct-to-fabric printing allows for precise control over the ink application and can result in better ink adhesion.
Heat Setting Techniques
Applying heat to the printed fabric can help fix the ink in place and prevent fading or smudging.
- Ironing: Use a hot iron to apply gentle pressure to the printed area, ensuring the ink penetrates the fabric fibers.
- Temperature Control: Set the iron to a medium-high temperature (around 300°F/150°C) to achieve optimal heat transfer.
- Drying Time: Allow the fabric to cool completely before handling or washing to prevent ink smudging.
Additional Tips and Considerations
When working with fabric printing, consider the following factors to achieve the best results:
- Pre-treatment: Apply a fabric primer or sizing agent to enhance ink adhesion and prevent bleeding.
- Color Selection: Choose ink colors that complement the fabric’s natural color palette to minimize visibility of the ink.
- Washing Instructions: Provide care instructions to customers, recommending cold water washes and gentle drying cycles to preserve the ink.
Best Practices for Long-Term Ink Adhesion
By following these guidelines and experimenting with different techniques, you can achieve long-lasting ink adhesion on fabric:
- Test and Refine: Conduct thorough testing on various fabric types and ink combinations to optimize results.
- Monitor Temperature and Pressure: Adjust iron settings and pressure to find the ideal balance for your specific printing setup.
- Store Printed Fabrics Properly: Keep printed fabrics away from direct sunlight, moisture, and extreme temperatures to prevent ink degradation.
Conclusion
With a solid understanding of ink properties, fabric types, and heat setting techniques, you’ll be well-equipped to create stunning, long-lasting prints on fabric.

Choosing the Best Ink for Stamping on Fabric
When it comes to stamping on fabric, selecting the right ink is crucial for achieving high-quality results.
- Textile Paints: These paints are specifically designed for use on fabric and offer excellent durability and color retention.
- Fabric Paints: Similar to textile paints, fabric paints are formulated to adhere well to fabric and provide long-lasting colors.
- Acrylic Paints: While acrylic paints can be used on fabric, they may not hold up as well as textile or fabric paints.
- Permanent Ink Stamp Pads: These pads are ideal for creating bold, vibrant designs on fabric.
At Sweet Pea Stamps, we recommend using our high-quality textile paints or fabric paints for optimal results.
- Look for paints that are specifically labeled as “textile” or “fabric” friendly.
- Choose paints that are lightfast and resistant to fading.
- Consider the type of fabric you’re working with and select a paint that’s suitable for that material.
- Always follow the manufacturer’s instructions for application and drying times.
By choosing the right ink for your fabric-stamping needs, you’ll be able to achieve professional-looking results that last.
Additional Tips for Working with Ink on Fabric
- Mix and match different colors to create unique, custom hues.
- Experiment with different brushstrokes and techniques to add texture and interest to your designs.
- Consider adding additional embellishments, such as beads or sequins, to enhance your finished pieces.
- Don’t be afraid to get creative and try new things – it’s all part of the fun of fabric stamping!
Getting Started with Fabric Stamping
Ready to give fabric stamping a try? Start by exploring our collection of high-quality stamps and inks, and don’t hesitate to reach out if you have any questions or need further guidance.

Stamping Neatly: A Guide
To achieve neat and crisp stamps, it’s essential to understand the basics of stamping and the tools involved.
- Choose the Right Ink: Select a high-quality ink pad specifically designed for your stamping needs. Look for ink pads with a smooth, even texture and a rich color payoff.
- Select the Correct Stamp: Choose a stamp that suits your design requirements. Consider the size, shape, and detail level of the stamp to ensure it meets your needs.
- Achieve Even Pressure: Apply gentle yet firm pressure to the stamp, making sure to cover the entire surface evenly. This ensures consistent ink transfer and prevents smudging.
- Maintain Cleanliness: Keep your workspace clean and free of debris to prevent ink smudges and uneven stamping.
- Experiment with Techniques: Try different stamping techniques, such as layering, blending, and embossing, to add depth and interest to your designs.
Tips for Achieving Smooth Stamps
- Use a High-Quality Stamp: Invest in a well-made stamp with a smooth, even surface. This ensures consistent ink transfer and prevents smudging.
- Apply Even Pressure: Use a bone folder or a similar tool to apply even pressure to the stamp, ensuring consistent ink transfer.
- Keep Your Workspace Clean: Maintain a clean workspace to prevent ink smudges and uneven stamping.
- Experiment with Different Inks: Try various ink colors and types to achieve unique effects and textures.
- Practice Makes Perfect: Don’t be discouraged if your initial attempts at stamping don’t yield perfect results. Practice regularly to develop your skills and achieve professional-looking stamps.
Additional Resources
For more information on stamping techniques and tips, visit our Stamping Tips page or explore our Community Forum to connect with fellow crafters and learn from their experiences.
Stamping Clearly
To stamp clearly, start by preparing your stamp and surface.
-
Clean your stamp regularly using a damp cloth or baby wipe to remove any debris or dried ink.
-
Choose a suitable surface for stamping, such as cardstock, paper, or fabric.
-
Maintain a consistent pressure while applying the stamp to prevent smudging or distortion.
-
Experiment with different ink colors and stamp sizes to find the perfect combination for your project.
Tips for Clear Stamp Printing
-
Use high-quality ink pads specifically designed for clear stamps to ensure crisp, vibrant prints.
-
Apply gentle pressure to avoid pushing excess ink onto surrounding areas.
-
Consider using a stamp positioning tool or ruler to achieve precise alignment.
-
For intricate designs, try using a smaller stamp size or experimenting with layering multiple stamps.
Common Mistakes to Avoid
-
Avoid applying too much pressure, which can cause the ink to bleed or spread unevenly.
-
Don’t use low-quality ink pads or old, dried-out ink, as this can result in poor print quality.
-
Be mindful of the surface texture and material, as these can affect the stamp’s adhesion and print quality.
-
Don’t mix and match different ink colors or brands, as this can lead to unpredictable results.
Best Practices for Clear Stamp Storage and Maintenance
-
Store your clear stamps in a dry, cool place away from direct sunlight.
-
Keep your ink pads clean and well-maintained to prevent clogging and drying out.
-
Regularly inspect your stamps for signs of wear or damage, replacing them as needed.
-
Consider investing in a stamp storage case or organizer to keep your collection tidy and easily accessible.

Putting a Stamp on an Envelope: Best Practices
When it comes to putting a stamp on an envelope, there are several things to keep in mind to ensure that your mail gets processed correctly.
-
Positioning the Stamp
-
Avoid Covering the Address
-
Other Considerations
The most important thing to remember is to place the stamp in the top right corner of the envelope, aligned with the return address on the top left corner.
Make sure the stamp doesn’t cover the address, as this can cause issues with the postal service’s ability to scan and process the mail.
While these tips may seem simple, they’re essential for ensuring that your mail reaches its destination quickly and efficiently.
Common Mistakes to Avoid
Some common mistakes people make when putting a stamp on an envelope include:
- Placing the stamp too close to the edge of the envelope
- Covering the address with the stamp
- Not aligning the stamp with the return address
Best Practices for Putting a Stamp on an Envelope
To ensure that your mail gets processed correctly, follow these best practices:
- Place the stamp in the top right corner of the envelope
- Align the stamp with the return address on the top left corner
- Make sure the stamp doesn’t cover the address
- Use a stamp that is clearly visible and easy to read
Additional Tips
For added security and convenience, consider using a stamp with a barcode or other tracking information.
This can help ensure that your mail is processed quickly and efficiently, and can also provide valuable tracking information in case your mail goes missing.
Conclusion
By following these best practices and avoiding common mistakes, you can help ensure that your mail gets processed correctly and reaches its destination quickly and efficiently.

0 Comments