

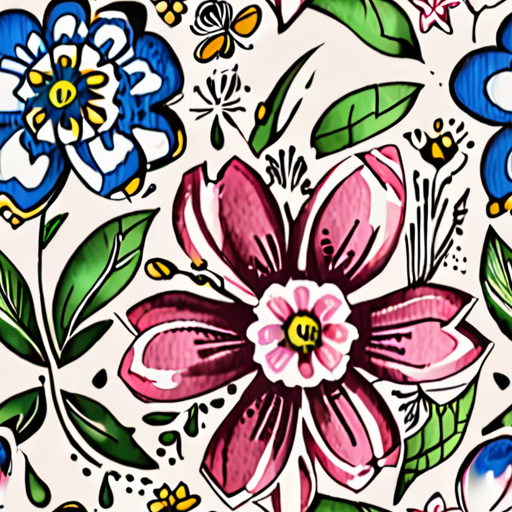
Scrapbooking enthusiasts, rejoice! With the right techniques and tools, you can transform your memories into stunning works of art that showcase your creativity and personality. One of the most versatile and expressive elements in scrapbooking is stamping, which allows you to add intricate details, textures, and patterns to your pages. However, mastering stampling techniques for scrapbooking requires patience, practice, and a solid understanding of how to use stamps effectively.

Getting Started with Scrapbooking Using Stamps
I’m excited to share my passion for scrapbooking with you, and today we’re going to explore how to use stamps to create beautiful and meaningful memories.
- Choosing the Right Stamps
- Clear Stamps
When selecting stamps for scrapbooking, consider the theme and style of your project. At Sweet Pea Stamps, we offer a wide variety of designs to suit every taste and preference.
Our clear stamps are made from high-quality materials and are easy to use. To get started, simply place the stamp on your work surface and apply ink using a brayer or ink pad.
- Apply even pressure to the stamp, making sure to cover the entire design.
- Lift the stamp carefully, taking care not to smudge the ink.
- Clean your stamp regularly using a baby wipe or soap and water.
For a more vibrant look, try using colored stamps. These can be applied using a similar process to clear stamps, but be sure to choose a matching ink color.
To take your scrapbooking to the next level, try these tips:
- Experiment with different stamp combinations to create unique designs.
- Use a stamp positioner to achieve precise placement.
- Try layering stamps for added texture and interest.
At Sweet Pea Stamps, we believe in supporting our community of crafters. Check out our blog for inspiration, tutorials, and tips from fellow artists.
Don’t be afraid to think outside the box and try new things. With practice and patience, you’ll become a master of scrapbooking with stamps.
Explore Our Stamp Collection Join Our Community Forum
The Rule of Three in Scrapbooking
In scrapbooking, the rule of three refers to the principle of balancing composition by dividing the layout into thirds both horizontally and vertically.
- This technique helps create visual interest and harmony in the design, making it easier for viewers to navigate and appreciate the artwork.
- To apply the rule of three, start by imagining two horizontal lines and two vertical lines that intersect to divide the layout into nine equal parts.
- Place important elements along these lines or at their intersections to create balance and visual appeal.
- Remember, the rule of thirds is a guideline, not a hard-and-fast rule – feel free to experiment and adjust according to your personal style and creative vision.
Benefits of Using the Rule of Three
By incorporating the rule of three into your scrapbooking designs, you can:
- Create visually appealing compositions that draw the viewer’s eye through the layout.
- Add depth and dimension to your artwork, making it more engaging and interesting.
- Balance competing elements and create a sense of harmony in the design.
- Guide the viewer’s attention to specific areas of the layout, highlighting important details and stories.
Tips for Applying the Rule of Three
To get the most out of the rule of three, keep the following tips in mind:
- Experiment with different layouts and compositions to find what works best for your art.
- Pay attention to the negative space around your elements, allowing it to breathe and contribute to the overall design.
- Don’t be afraid to break the rules and try something new – sometimes the best art comes from pushing boundaries!
- Practice makes perfect, so don’t be discouraged if it takes time to develop your skills and intuition.
What Not to Do When Scrapbooking
As a seasoned crafter and enthusiast of scrapbooking, I’ve learned a thing or two about what not to do when embarking on this creative journey.
-
Mistake #1: Overcrowding Your Pages
One common mistake many scrapbookers make is overcrowding their pages with too much embellishment. While it’s tempting to add every photo, sticker, and die-cut, remember that less can often be more.
Instead, focus on telling a story with a few select items, leaving plenty of negative space to let your design breathe.
-
Mistake #2: Using Low-Quality Photos
Don’t sacrifice image quality for the sake of convenience. Use high-resolution photos that will print beautifully and last for years to come.
Avoid using low-quality images from social media or poorly lit smartphone shots – they’ll detract from the overall aesthetic of your scrapbook.
-
Mistake #3: Ignoring Journaling
Journaling is an essential part of scrapbooking, allowing you to capture memories and tell the story behind your photos.
Don’t neglect this crucial element – take the time to write down dates, events, and personal anecdotes to make your scrapbook truly special.
-
Mistake #4: Being Afraid to Experiment
Scrapbooking is all about trying new things and pushing the boundaries of creativity.
Don’t be afraid to experiment with different techniques, materials, and designs – it’s okay to make mistakes and learn from them.
-
Mistake #5: Failing to Plan Ahead
Before starting a new scrapbook project, take the time to plan out your layout and design.
This will save you frustration and ensure that your final product looks polished and professional.
-
Mistake #6: Not Having Fun
Scrapbooking is supposed to be enjoyable, so don’t get too caught up in perfectionism!
Remember to relax, have fun, and enjoy the process of creating something beautiful and meaningful.
By avoiding these common mistakes, you’ll be well on your way to creating stunning scrapbooks that showcase your personality and style.
Happy crafting!
Getting Started with Rubber Stamping
As a beginner, getting started with rubber stamping can seem overwhelming, but don’t worry, I’m here to guide you through the process.
-
Invest in Quality Stamps
I recommend investing in high-quality stamps from reputable brands like Sweet Pea Stamps. Their stamps are made from durable materials and come in a variety of designs.
-
Choose the Right Ink
You’ll need to choose the right ink for your stamps. Look for ink pads that are specifically designed for rubber stamping and are easy to clean.
-
Select a Variety of Paper Types
Rubber stamping can be done on a variety of paper types, including cardstock, watercolor paper, and even fabric.
-
Practice, Practice, Practice!
The key to mastering rubber stamping is practice. Start with simple designs and gradually move on to more complex ones.
-
Experiment with Different Techniques
Don’t be afraid to experiment with different techniques, such as layering, blending, and embossing.
-
Join a Community
Connecting with other rubber stamping enthusiasts can be a great way to learn new techniques and get inspiration.
-
Take Online Classes or Workshops
If you prefer learning through video tutorials or live classes, consider taking online classes or workshops to improve your skills.
-
Stay Up-to-Date with Trends
Rubber stamping is constantly evolving, so stay up-to-date with the latest trends and techniques by following popular bloggers and artists.
-
Have Fun!
Most importantly, remember to have fun! Rubber stamping is a hobby that allows you to express your creativity and relax.
Tips for Beginners
Here are some additional tips for beginners:
-
Start with Simple Designs
Begin with simple designs and gradually move on to more complex ones.
-
Use a Light Box
A light box can help you position your stamps accurately and prevent smudging.
-
Clean Your Stamps Regularly
Cleaning your stamps regularly will help prevent ink buildup and keep them looking their best.
-
Experiment with Different Colors
Don’t be afraid to try out different colors and combinations to find what works best for you.
Resources
For more information and inspiration, check out these resources:
-
Sweet Pea Stamps Blog
Our blog features tutorials, tips, and inspiration for rubber stamping enthusiasts.
-
Rubber Stampers Unite
This online community connects rubber stamping enthusiasts from around the world.
-
Stamping Supplies
Find a variety of rubber stamping supplies, including stamps, ink, and paper, at our online store.
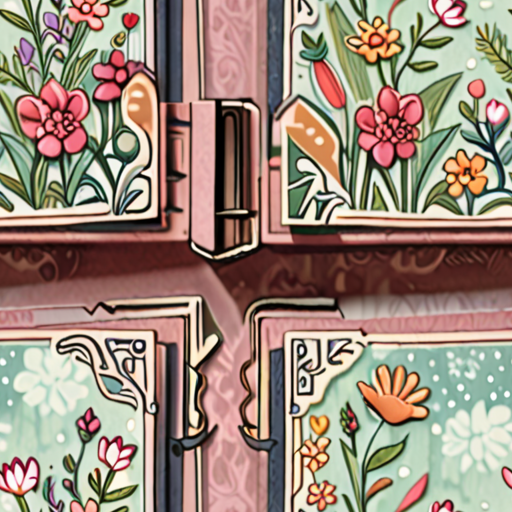
Unleash Your Creativity: Combining Stamping Techniques with Other Scrapbooking Elements
As a crafter, I’m always looking for new ways to push my boundaries and try out fresh techniques. One of my favorite things to do is combine stamping techniques with other scrapbooking elements to create truly unique designs.
- Embellishments: Adding embellishments like buttons, ribbons, or flowers can instantly elevate your design and give it a personal touch. Try pairing a bold stamp image with delicate lace or a sprinkle of glitter for added visual interest.
- Die-cuts: Die-cutting machines have revolutionized the world of paper crafting, allowing us to cut intricate shapes and designs with ease. Combine die-cuts with stamps to create stunning layered effects or use them as a background element to add texture and depth.
- Paper Crafting: Experiment with different textures and patterns by layering paper crafting elements like cardstock, patterned paper, or vellum. Use stamps to add subtle details or bold images to create contrast and visual interest.
- Photos and Memorabilia: Incorporating photos and memorabilia into your scrapbook pages can make them truly special. Use stamps to add captions, borders, or decorative elements around your photos, or create a collage effect by layering multiple images.
Getting Started with Combination Techniques
To get started with combining stamping techniques with other scrapbooking elements, begin by experimenting with different materials and tools. Don’t be afraid to try new things and make mistakes – they often lead to unexpected and exciting results!
- Choose a Theme: Select a theme or concept for your scrapbook page, such as a holiday, season, or special event. This will help guide your choice of colors, images, and embellishments.
- Select Your Stamps: Pick a few stamps that fit your theme and style, and experiment with different combinations to find what works best for you.
- Add Embellishments: Choose a few embellishments that complement your stamps and theme, and arrange them thoughtfully to add visual interest.
- Layer and Texture: Experiment with layering different elements, like paper crafting, die-cuts, or photos, to add depth and texture to your design.
Tips and Tricks for Success
Here are a few tips and tricks to keep in mind when combining stamping techniques with other scrapbooking elements:
- Balance and Harmony: Strive for balance and harmony in your design by distributing elements thoughtfully and considering color, texture, and scale.
- Experimentation is Key: Don’t be afraid to try new things and take risks – it’s often the most unexpected combinations that lead to the most beautiful results.
- Keep it Simple: Remember that sometimes less is more. Don’t feel obligated to overload your design with too many elements – sometimes simplicity is the most effective approach.
Sweet Pea Stampsoffers a wide variety of high-quality stamps and supplies perfect for combining stamping techniques with other scrapbooking elements. Visit our website today to explore our collection and start creating!
Mastering Different Stamping Techniques for Scrapbooking Projects
As a crafter, I’m always looking for ways to take my scrapbooking projects to the next level, and mastering different stamping techniques is a great place to start.
-
Understanding Basic Stamping Techniques
Before diving into advanced techniques, it’s essential to understand the basics of stamping. This includes learning how to properly ink and position your stamps, as well as experimenting with different stamp sizes and shapes.
-
Inking and Positioning
To get started, you’ll need to learn how to properly ink your stamps. This involves applying the right amount of ink to the stamp, making sure it’s evenly distributed, and then positioning it correctly on your paper.
-
Experimenting with Stamp Sizes and Shapes
Once you’ve mastered basic stamping techniques, it’s time to experiment with different stamp sizes and shapes. This can add visual interest to your designs and help you create unique and eye-catching effects.
-
-
Advanced Stamping Techniques
Now that you have a solid understanding of basic stamping techniques, it’s time to move on to more advanced methods. These can include techniques like layering, blending, and texture-building.
-
Layering
Layering involves building up layers of color and texture to create complex and visually interesting designs. This can be achieved by using multiple stamps, inks, and techniques.
-
Blending
Blending involves merging two or more colors together to create a smooth, gradient-like effect. This can be achieved by using a blending tool or by layering inks.
-
Texture-Building
Texture-building involves adding texture to your designs using stamps, embossing powders, or other materials. This can add depth and interest to your creations.
-
-
Tips and Tricks for Mastering Stamping Techniques
Mastering stamping techniques takes practice, patience, and experimentation. Here are a few tips and tricks to help you along the way:
-
Practice Regularly
The more you practice, the better you’ll become at stamping. Set aside time each week to work on your skills and experiment with new techniques.
-
Experiment with Different Materials
Don’t be afraid to try out new materials and techniques. Experimenting with different inks, papers, and tools can help you discover new effects and styles.
-
Watch Tutorials and Online Classes
Watching tutorials and online classes can be a great way to learn new techniques and stay inspired. Look for classes and tutorials that focus on stamping and scrapbooking.
-
Conclusion
Mastery of stamping techniques takes time and practice, but with patience and persistence, you can create beautiful and unique scrapbooking projects. Remember to experiment with different materials and techniques, watch tutorials and online classes, and practice regularly to improve your skills.
0 Comments