

Woodworking enthusiasts and crafty individuals alike are constantly seeking innovative ways to add unique designs and patterns to their wooden creations. One technique that has gained popularity in recent years is wood stamping, which allows users to transfer intricate images and textures onto various types of wood. However, many beginners may find themselves overwhelmed by the numerous options available, from choosing the right ink to selecting the perfect stamp. In this comprehensive guide, we will delve into the world of wood stamping, exploring the best practices, techniques, and materials needed to achieve stunning results.
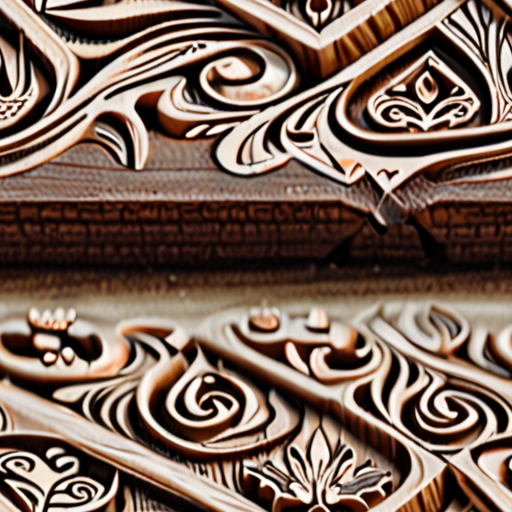
The Best Ink to Stamp on Wood
When it comes to stamping on wood, choosing the right ink can make all the difference in achieving professional-looking results.
- Staz On: A popular choice among crafters, Staz On is known for its water-resistant properties and vibrant colors. Its fast-drying formula ensures that your designs stay crisp and clean, making it ideal for wood stamping.
- Tim Holtz Distress Inks: These versatile inks offer a range of subtle, muted tones perfect for creating distressed or vintage effects on wood. Their blendable nature allows for easy layering and blending, adding depth and dimension to your designs.
- Scrapbook Com: While primarily a scrapbooking supply store, Scrapbook Com offers a variety of inks suitable for wood stamping, including metallic and glitter options for added flair.
As a crafter, it’s essential to experiment with different ink types and techniques to find what works best for your unique style and projects. Remember to always follow safety precautions when working with ink, and consider using a sealant to protect your finished designs from fading or damage.
At Sweet Pea Stamps, we’re passionate about helping you unlock your full creative potential. Explore our collection of high-quality stamps and inks, and discover the joy of bringing your imagination to life on wood and beyond!
Will Ink Stamps Work on Wood?
The short answer is yes, ink stamps can work on wood, but it depends on several factors.
- Type of wood:
- Softwoods like pine or fir may absorb ink well, while hardwoods like oak or maple might require more pressure or special ink.
- Ink type:
- Dye-based inks tend to work better on wood than pigment-based inks.
- Stamp design:
- A deep, intricate design may require more ink and pressure to transfer onto wood.
- Preparation:
- Clean and dry the wood surface before stamping.
To get the best results, try using a high-quality dye-based ink specifically designed for wood or paper crafts. Experiment with different stamp designs and pressures to find what works best for your project.
Tips for Successful Wood Stamping:
- Choose the right ink and stamp combination for your project.
- Prepare the wood surface properly.
- Apply gentle to moderate pressure, depending on the design and ink.
- Experiment with different stamping techniques, such as layering or using a brayer.
Common Issues and Solutions:
- Inconsistent ink transfer:
- Check the ink consistency and adjust as needed.
- Fading or bleeding:
- Use a fixative or sealant to protect the design.
With these tips and considerations, you’ll be well on your way to achieving beautiful, long-lasting ink stamp designs on wood.
Stamping into Wood
To get started with stamping into wood, you’ll need a few basic tools and materials.
- A wooden surface, such as a plank or board
- A stamp or carving tool, specifically designed for wood
- A mallet or hammer
- A design or pattern to follow
Preparing the Surface
Before you begin stamping, make sure your wooden surface is clean and dry. If necessary, sand the surface to smooth out any rough edges or splinters.
- Choose a design or pattern to follow, taking into account the size and shape of your stamp
- Place the stamp onto the wooden surface, aligning it with your chosen design
- Gently tap the mallet or hammer against the stamp to create the impression
- Continue stamping along the design, adjusting the position of the stamp as needed
Tips and Variations
For a more intricate design, consider using multiple stamps or layering different patterns.
- Experiment with different stamp sizes and shapes to create unique textures and effects
- Try combining stamps with other woodworking techniques, such as carving or engraving
- Consider adding color or texture to your stamped design using paint, ink, or other mediums
Common Mistakes to Avoid
When stamping into wood, be mindful of the following common mistakes:
- Failing to properly prepare the surface, leading to uneven or distorted impressions
- Using too much pressure, which can cause the stamp to slip or the wood to crack
- Not adjusting the position of the stamp between impressions, resulting in inconsistent spacing or alignment
Things I Can Stamp
I love getting creative with my everyday objects and turning them into fun and unique stamps.
- Household Items: I find that child-safe kitchen utensils made of plastic or metal work really well as stamps. Other great options include berry baskets, foil or foil balls, springs, and sponges.
- Washable Toys: My favorite washable toys to use as stamps are toy cars and wheels, doll hands and feet, marbles, ping pong balls, and blocks made of plastic, like Mega Blocks or Duplo.
Exploring More Options
When it comes to finding the perfect object to stamp with, I always look for something that has texture and pattern. Some of my favorite finds include:
- Sponges – These are great for creating soft, textured impressions.
- Foam sheets – Similar to sponges, foam sheets are perfect for adding a bit of texture to your stamped designs.
- Paper towel rolls – These can be cut down to size and used to create fun, geometric patterns.
- Cereal boxes – The corrugated cardboard in cereal boxes makes for a great stamping material.
Getting Creative with Stamping
The possibilities are endless when it comes to stamping with everyday objects! Don’t be afraid to think outside the box and experiment with different materials and techniques. Some of my favorite ways to get creative with stamping include:
- Mixing and matching different textures and patterns to create unique designs.
- Using multiple objects to create layered, dimensional effects.
- Experimenting with different inks and paints to change up the color and consistency of my stamps.
Can You Use Premade Wooden Decorations or Create Custom Designs When Stamping onto Wood Surfaces?
The world of wood stamping offers endless possibilities, and one of the most exciting aspects is deciding between premade wooden decorations and custom designs.
- Premade wooden decorations can save time and effort, providing a quick and easy solution for adding a personal touch to your woodworking projects.
- Custom designs, on the other hand, allow for complete creativity and flexibility, enabling you to bring your unique vision to life.
Benefits of Premade Wooden Decorations:
- Convenience: Premade wooden decorations are readily available and can be easily incorporated into your projects, saving you time and effort.
- Consistency: These decorations often come with a uniform design, ensuring a consistent look across your projects.
- Cost-effective: Premade wooden decorations can be more budget-friendly compared to creating custom designs from scratch.
Creating Custom Designs:
- Unlimited Creativity: With custom designs, the possibilities are endless, allowing you to experiment with unique shapes, patterns, and colors.
- Personal Touch: Custom designs enable you to infuse your personality and style into your woodworking projects, making them truly special.
- Professional Finish: A well-designed custom decoration can elevate the overall appearance of your project, giving it a professional finish.
Designing Your Own Custom Wooden Decorations:
- Start by brainstorming ideas and sketching out your design concept.
- Choose the right materials and tools for your project, considering factors like durability and ease of use.
- Experiment with different techniques and patterns to achieve the desired effect.
- Refine your design and make adjustments as needed until you’re satisfied with the result.
Getting Started with Wood Stamping:
If you’re new to wood stamping, consider starting with premade decorations to get a feel for the process and gain confidence in your skills.
As you become more comfortable, you can begin experimenting with custom designs, pushing the boundaries of what’s possible with wood stamping.
Remember, the key to success lies in embracing your creativity and having fun with the process!
Unleash Your Creativity: 15 Innovative Ways to Add Personalized Designs to Wooden Items Using Stamping Techniques
Add a personal touch to your home decor with unique stamping ideas for wood.
- Create custom designs using our extensive collection of wooden stamps, available in various shapes, sizes, and patterns.
- Experiment with different stamping techniques, such as layering, texture mixing, and color blending, to achieve unique effects.
- Combine stamping with other crafts, like painting, stenciling, or decoupage, to add extra dimension and interest to your projects.
- Use our versatile stamping ink pads to achieve bold, vibrant colors or subtle, muted tones, depending on your design preference.
- Try stamping on various types of wood, including reclaimed, birch, or pine, to create distinct textures and appearances.
- Get inspired by nature and use leaf-shaped stamps to create organic, earthy designs.
- Stamp intricate patterns and details onto small wooden items, such as coasters, magnets, or jewelry boxes.
- Collaborate with friends or family members to create joint art pieces or gifts featuring personalized stamping designs.
- Take advantage of our online tutorials and video guides to learn new stamping techniques and stay up-to-date with the latest trends.
- Join our community forum to share your own stamping projects, ask questions, and get feedback from fellow crafters.
- Discover new stamping supplies and materials through our curated selection of products and recommended vendors.
- Stay organized and efficient with our stamp storage solutions, perfect for storing and transporting your favorite stamps.
- Learn how to clean and maintain your stamps to extend their lifespan and ensure optimal performance.
- Explore our seasonal stamp collections, featuring limited-edition designs and themes tailored to specific holidays or occasions.
- Participate in our monthly challenge series, where we encourage you to push your creativity and experiment with new stamping techniques.
Popular Brands and Resources:
- Rubber Stamp Chat
- Stampin’ Up!
- Hobby Lobby
Conclusion:
With these 15 innovative ways to add personalized designs to wooden items using stamping techniques, you’ll be well on your way to unleashing your creativity and taking your crafting skills to the next level. Remember to always experiment, take risks, and have fun – and don’t hesitate to reach out to our community for support and inspiration along the way!
0 Comments